Translate

Sunday, November 30, 2014

C# Return data from a thread

The easiest way to get a return value from a thread in C# is to start it as a Task.

public static void Main(String[] args)
   {
       Task<int> task = Task.Run(() => Add(1, 2));
       int result = task.Result;
   }
 
   public static int Add(int a, int b)
   {
       return a + b;
   }

You can also add multiple lines of code to the task

Task<int> task = Task.Run(() =>
    {
        Console.WriteLine("Adding..");
        return Add(1, 2);
    });

Note here that int result = task.Result; blocks the main thread until the result is obtained.


Catching Exceptions in tasks


     try
     {
         Task<int> task = Task.Run(() => Add(1, 2));
 
         task.Wait();
     }
     catch (AggregateException ex)
     {
         Console.WriteLine(ex.InnerException.Message);
     }

Asynchronously running a thread

You don't have to wait for the result. You can kick off the process to fetch the result and then continue doing something else. You can then run some other code when the result is finally available.


using System;
using System.Runtime.CompilerServices;
using System.Threading;
using System.Threading.Tasks;
 
internal class Test
{
    public static void Main(String[] args)
    {
        Task<int> task = Task.Run(() => Add(1, 2));
        TaskAwaiter<int> awaiter = task.GetAwaiter();
        awaiter.OnCompleted(() =>
        {
            Console.WriteLine("The result is {0}", awaiter.GetResult());
 
        });
 
        Console.WriteLine("past awaiter");
        Thread.Sleep(20000);   
        Console.WriteLine("The end");
    }
 
    public static int Add(int a, int b)
    {
        for (int i = 0; i < int.MaxValue; i++)
        {
            int x = 10;
        }
        return a + b;
    }
}


Sunday, November 9, 2014

Logstash config for IIS logs

Taking help from this article, I came up with a logstash.conf file that works both for IIS and apache tomcat at the same time.


input {

    file {    
         
 path => ["C:/inetpub/logs/LogFiles/W3SVC1/*.log"]
  type => ["iislog"]
    }

file {    
         
         path => ["C:/Program Files/apache-tomcat-7.0.55/logs/*.txt"]
    type => ["tomcatTxtLog"]
    }

}


filter {
  if [type] == "iislog" {
 
         #ignore log comments
         if [message] =~ "^#"
{
            drop {}
         }
grok {
             
 match => ["message", "%{TIMESTAMP_ISO8601:log_timestamp} %{WORD:iisSite} %{IPORHOST:site} %{NOTSPACE:Sip} %{NOTSPACE:verb} %{URIPATH:request} %{NOTSPACE:QueryString} %{NUMBER:port} %{NOTSPACE:Hyphen1} %{NOTSPACE:Cip} %{NOTSPACE:httpversion} %{NOTSPACE:UserAgent} %{NOTSPACE:Hyphen2} %{NOTSPACE:Hyphen3} %{NOTSPACE:referer} %{NUMBER:response} %{NUMBER:subresponse} %{NUMBER:scstatus} %{NUMBER:bytes:int} %{NUMBER:timetaken:int}"]
            }
date
{
            match => [ "log_timestamp", "YYYY-MM-dd HH:mm:ss" ]
       timezone => "Etc/GMT"
         }
mutate {
            remove_field => [ "Hyphen1","Hyphen2","Hyphen3","Sip","Cip","log_timestamp"]
         }
     }
  else if [type] == "tomcatTxtLog" {
  #ignore log comments
  if [message] =~ "^#"
{
            drop {}
         }
         grok {
           match => ["message", "%{COMMONAPACHELOG}"]
           }
  date
  {    
            match => [ "timestamp", "dd/MMM/yyyy:HH:mm:ss Z" ]
            timezone => "Etc/GMT"
           }
   mutate {
            remove_field => [ "timestamp"]
         }
 
     }
}

output{
   elasticsearch {
     cluster=>"VivekLocalMachine"
      port => "9200"
      protocol => "http"
    }
}


Wednesday, November 5, 2014

Viewing tomcat logs with Logstash in a Windows 7 machine (Logstash beginner level tutorial/walkthrough)

If you want to monitor logs from multiple sources, for example tomcat, IIS and so on from a single location, logstash is your friend. The way logstash works is that it takes log data from multiple sources and formats all of them into the same format and pushes that data for storage into elastic search. You then use Kibana to monitor that data.


In this article we will just look at a very basic example to help you get started. Do these steps to follow along

Prerquisites

  • You need jdk (I have jdk1.7.0_67)
  • You need to have apache tomcat installed

Steps

Install logstash


Unzip that file and copy it into C:\Program Files


Install and start up Elastic search


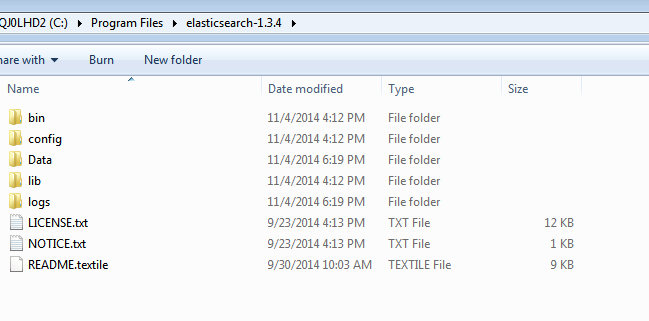
Unzip it and copy it into C:\Program Files\elasticsearch-1.3.4


Open C:\Program Files\elasticsearch-1.3.4\config\elasticsearch.yml in notepad
Change clustername to whatever you like. I set mine to VivekLocalMachine


################################### Cluster ###################################

# Cluster name identifies your cluster for auto-discovery. If you're running
# multiple clusters on the same network, make sure you're using unique names.
#
cluster.name: VivekLocalMachine

Double click C:\Program Files\elasticsearch-1.3.4\bin\elasticsearch.bat to start up elastic search service.


Install Kibana and point it to the elastic search service


Copy Kibana to your tomcat webapps folder, for me that was C:\Program Files\apache-tomcat-7.0.55\webapps

Overwrite
C:\Program Files\apache-tomcat-7.0.55\webapps\kibana-3.1.1\app\dashboards\default.json
with the contents of
C:\Program Files\apache-tomcat-7.0.55\webapps\kibana-3.1.1\app\dashboards\logstash.json

Open C:\Program Files\apache-tomcat-7.0.55\webapps\kibana-3.1.1\config.js  in notepad.
Check the value of elasticsearch. That is where Kibana would be looking for elastic search database.

Open kibana web ui in browser. You can open it directly from tomcat manager. For me that url was
http://localhost:8080/kibana-3.1.1/#/dashboard/file/default.json


If you are hosting Kibana in IIS instead of tomcat, you need to add json mime type to IIS.

Set logstash configuration to read tomcat log and pump that data into elastic search


First we need to create a *.conf file (you can give it any name). This file is what will tell logstash where to read the data from and where to send that data to.  I am going to create a file called logstash.conf in C:\Program Files\logstash-1.4.2\bin.


Logstash conf file consists of three parts shown below

input{

}
filter
{

}
output
{

}

Input: This tells logstash where the data is coming from. For example File, eventlog, twitter, tcp and so on. All the supported inputs can be found here.

Filter: This tells logstash what you want to do to the data before you output it into your log store (in our case elasticsearch). This accepts regular expressions. Most people use precreated regular expressions called grok, instead of writing their own regular expressions to parse log data. The complete list of filters you can use can be seen here.

Output: This tells logstash where to putput this filtered data to. We are going to output it into elasticsearch. You can have multiple outputs if you want.


This is how my logstash.conf looks like


input {

    file {    
       
 path => ["C:/Program Files/apache-tomcat-7.0.55/logs/*.log"]
    }

}

filter {

 
}

output{

   elasticsearch {
     cluster=>"VivekLocalMachine"
      port => "9200"
      protocol => "http"
    }
}


The cluster name should match what you set in C:\Program Files\elasticsearch-1.3.4\config\elasticsearch.yml

Many times when I made changes to my  logstash.conf , I have had to restart the machine that hosted logstash, for these changes to take effect. Restarting logstash didn't always help.


Start up logstash


In the command prompt cd into
C:\Program Files\logstash-1.4.2\bin

Then run this
logstash.bat agent -f logstash.conf


Now you should start seeing data in real time in your kibana website. For me that url is
http://localhost:8080/kibana-3.1.1/index.html

Adding a filter in logstash conf file


Lets take this example one step further by adding a filter in the C:\Program Files\logstash-1.4.2\bin\logstash.conf  file. 

We will be adding a "grok" filter. The purpose of adding this filter is to format the log text into a format that is easier to read. Log stash comes with many pre created regular expressions in 

C:\Program Files\logstash-1.4.2\patterns\

All these regular expressions are given names in these patterns files. We will be using those names in our grok filter.

Given below in the logstash.conf file with a filter applied. 

input {

    file {    
       
 path => ["C:/Program Files/apache-tomcat-7.0.55/logs/*.txt"]
  type => ["tomcatTxtLog"]
    }


}

filter {
      grok {
           match => ["message", "%{COMMONAPACHELOG:myCustomColumn}"]
           }
}


output{

   elasticsearch {
     cluster=>"VivekLocalMachine"
      port => "9200"
      protocol => "http"
    }
}


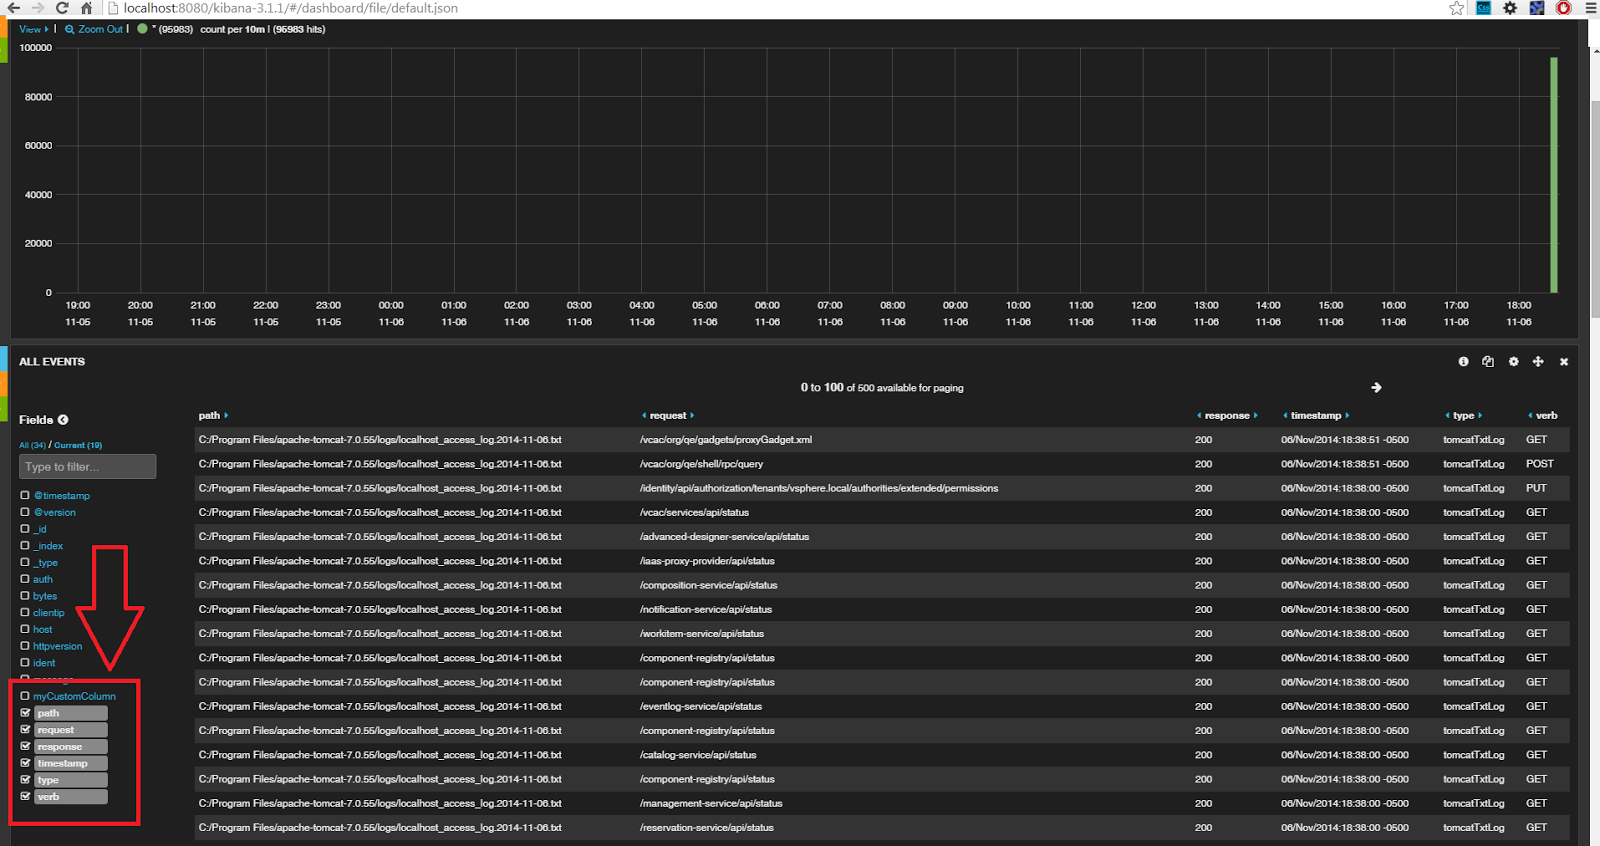
This is how the kibana output looks like with the filter applied.


Use this tool to play around with grok filters.

To test the example above  put these values into the grok Debugger

0:0:0:0:0:0:0:1 - - [30/Oct/2014:17:08:41 -0400] "GET / HTTP/1.1" 200 11418


%{COMMONAPACHELOG}


To check the indices created by logstash in elastic search go to this url
http://localhost:9200/_cat/indices?v

Check this for a more detailed explanation on logstash filters.
Check this for more on logstash configuration files.